Monday 28 March 2016

Welcome to Buzzy Friends

I've written this post with my bee-mates in the BuzzyFriendsQuiltingBee in mind, so it may be very wordy and picture heavy!


I've had Anna Maria Horners' Feather Bed pattern on my never-ending wish list for quite a while, so it seemed the perfect choice for my month in the bee.I'm going to try and include everything I did when making my practice block, some of which is probably very basic information, which you may not need, but as I'm trying to be thorough I don't want to miss anything out.

Printing out the pattern.
Genourously, Anna Maria Horner offers this as a free pattern on her website, click here for the link.
Just a note of caution - when you come to print out check which size option you choose '. I used 'actual size' in the print option. My pattern came out as 18 1/2 inches along the outside edge of the (F1 +F2) template piece when assembled (about 46.5 cm). This means my finished block, comprising two feathers, finishes at eighteen and a half inches square


I found it helpful to leave a bit of spare paper at the join of the F1 and F2 pieces (see middle picture) which meant I could stick one piece on top of the other and made the join a bit stronger, which is useful if it will be handled a lot.
Before you do anything else I suggest you read through the pattern. It is well written and covers everything you need to know.

Selecting and cutting the fabric.
For the Feathers.
I've chosen mostly quite strong saturated colours with a few lighter prints. I've also tried to mix up prints and plains, spots and checks, large and small scale pattern. This project is perfect for using up lots of scraps!
Choose your fabrics, cutting off strips as specified in the pattern (between 1 1/2 and 3 inches wide). Once you have cut your strips, you'll need to lay them out in an order you like. I prefer to have a bit of contrast between the strips, either by pattern or colour.

Piecing and pressing the feathers.
You can piece the strips together straight away in a 'all the ends level' arrangement as above or you can 'stagger' the ends to minimise wastage, which is what I did. To do that, lay out your strips and lay the feather piece over it, lining up the 'direction' lines parallel with the long edges. It's probably easier to see what I mean in the picture below.
When you are happy with your fabric placement pin the strips in pairs, being careful to keep the 'stagger' and sew together.
Carefully press the seams open, a lot of distortion can be introduced at this point if you don't press carefully.
Lay the strips out again to work out the stagger between the pairs, laying the template on top to make sure you are happy with the placement. Pin, sew, press, repeat as necessary until you achieve the size of pieced fabric panel you need.


Pin your template to the pieced panel - I found the fabric moved quite a bit, especially when cutting at the points and even more if there was a seam very close to the point of the feather.
These round headed pins aren't the best idea when you want to use a ruler over them!
NOTE - you must be aware of the alignment marks on the template pieces, do not just place the template against the cut edge of the fabric panel.
It is not possible to cut the left and right halves of the feather from a single pieced panel with this method. Anna Maria Horner describes a way to cut both left and right halves of the feather from a single large panel in her directions, which you may find useful.
Cutting the background fabric.
I have chosen to use yarn-dyed Essex linen (45% linen 55% cotton) as the background for my quilt. This fabric has a beautiful drape and is heavier than quilting weight cotton.
Essex linen is especially easy to use with this pattern as it does not have a 'right' side. Meaning there is less chance of error when cutting out the background pieces.
As I would need to send a piece of background fabric to each member of the Hive I needed to work out the most efficient way to lay out the templates on a single piece of fabric. I found this process easier if I made templates for each piece and laid them out on a single piece of fabric as shown. As I would need to send a piece of background fabric to each member of the Hive I needed to work out the most efficient way to lay out the templates on a single piece of fabric. I found this process easier if I made templates for each piece and laid them out on a single piece of fabric as shown below.

As I would need to send a piece of background fabric to each member of the Hive I needed to work out the most efficient way to lay out the templates on a single piece of fabric. I found this process easier if I made templates for each piece and laid them out on a single piece of fabric as shown below.


The fabric is sub cut as shown, to give two pieces of 18 and a half inches by six and a quarter inchesA piece of fabric 22 inches by 16 and a half inches is enough to make the background for one complete block of two feathers.


Lay an F template piece on one of these 181/2 by 6 1/4 rectangles, pin and cut. This gives you two F pieces. Repeat with the other rectangle (if using printed fabric, turn the template over, to give the reversed F piece for the other side of the feather).
Cutting the F pieces by this method helps to keep the outside edge straight along the grain of the fabric.
The B, D and E pieces are cut from the remaining fabric.


I
Before piecing together, I laid out my background pieces;

Taking the left side feather and B piece, lay them next to each other to make sure you have the correct piece and that they are the correct size.

Flip the background piece up and align the edges of the fabric. The ends need to overlap slightly, as shown below, in order for the pieces to align correctly once they are sewn together.
The pencil line represents the edge of the fabric, I have drawn a red dashed line a quarter of an inch from the fabric edge to show where the fabric will be stitched.
The needle should enter the fabric exactly at the 'V' formed where the two fabrics overlap and leave at the same place at the other end, as shown below.

When opened out the straight edges of the feather and background fabrics should form a continuous line. (Obviously, this doesn't happen exactly like this every time, which is why I own more than one seam ripper.)
Press the seams open and clip the dog ears. Repeat with the other side.

Sewing the spine of the feather - the C piece.

I found that this piece, probably because it is so long and thin, moved quite a bit relative to the other pieces.
I pinned quite extensively and on both sides I started sewing at the bottom of the block.
There is a little bit of wiggle room, in that you can trim a small amount from the top of the feather if needed without affecting the overall dimensions of the block.

Sewing the top of the feather - the D and E piece
Firstly, trim the feather to remove the excess 'spine, that protrudes past the edge. Then align the D piece next to the feather. I'll admit the first time I did this it looked 'wrong' for some reason. This is what it should look like;
Then flip the piece over and line it up with the edge of the feather.

When you open it out after stitching, it should look like this.


Tuesday 14 October 2014

Fourth quarter FAL 2014

Which should probably be titled 'third quarter repeat'.

As usual I didn't link up with my solitary finish; my scrappy cushion...


I was really pleased with how this turned out and was even more delighted that when I posted it on IG it won a Cotton and Steel bundle from the generous Amanda of Westwood acres.


On to my 'to do' list...


1) Rachel's scrappy stars - again !


2) Applique orange peel - destined to be a cushion.


3) IG miniswap- teamroseanne.

This has to be finished to make the postal deadline in early December. Paper piecing is not my forte but the whole purpose of joining the swap was to push myself to try new techniques, so it's working!


4) large star


I hit the buffers with this one when it came to joining the corner sections - I just can't get it to lie flat. I was hoping to get some uninterrupted time to play with it but that hasn't happened yet.


5) Plus Quilt. The fabric for this is cut, but I'm having second thoughts about colour/layout. I'm thinking this might be my Christmas holiday project. I like to have something 'easy' to work on over the holiday period as the house is usually quite full of people in pajamas/Xmas stuff. Which makes it almost impossible to work in my usual chaotic manner.


I know I'll finish at least the IG pineapple block mini. I usually finish another project that I haven't even thought of yet, too.


Good luck everyone :0)


Linking up with Katy and all the FAL peeps at The Littlest thistle


Monday 14 July 2014

Hopes and dreams....

.....for lots of finishes in Q3.

Let's just gloss over the fact that I didn't have an awful lot of finishes in Q2 and move right along, shall we?


1. Rachel's scrappy stars is making another appearance on the list.

This quilt is actually on her bed, binding on but quilting incomplete! I'm not sure what the quilt police would say about my flouting of the rules on this one.

I decided I wanted to FMQ stars in the negative spaces. I reasoned that as I had already done a straight line cross hatch through the stars it would be ok to bind it. And once it was bound it may as well live on the bed. I've FMQuilted a few stars already, I'm trying different designs to stretch myself a bit. Some designs are working better than others but overall I'm really pleased with this one.


2. Orange Peel applique blocks.

I've enjoyed the hand work on these, now to make them up into something, probably a cushion.


3. Ticker tape panel.

I only started this a couple of days ago, I was too tired to sew on Friday night but wanted to play with some fabric. I glued down these pieces (I've got a ziploc bag of trimmed scraps) and just went for it.

I've wanted to try this since I saw the lovely work in Sunday Morning Quilts. I decided to straight line quilt with two colours of variegated Aurifil thread, the lemon in one direction and the green in the other. This is destined to be another cushion, although I can see a whole quilt of these panels in my future. It's a lovely way of using up even teeny tiny pieces of fabric (less than one inch square) and makes you feel really virtuous ( to offset the guilt of buying more?).

4. Plus quilt

I've actually started cutting two quilts, with different size blocks. I'll go along with the smaller size first. I've cut 22 blocks so far and this is what they look like laid out;

I'm not in love with this yet, I think it needs to brew a little longer before I make a decision. I'll know I'll need more, so I'll keep adding to my bag'o'blocks.


5. Suburbs from a pattern by Alison of Cluck, Cluck Sew

I love these blocks but I'm only making sporadic progress.

I have cut about 15 blocks so far, but I think I might want to do something other than white for the background, so I'm stalled while I make my mind up.


6. Sewing pouch


This is the sewing pouch I made a few weeks ago for a friends birthday. I recreated one given to me as a gift 15 years ago. It's a really handy size and has been in almost daily use since.

I started cutting out a second one for myself, as mine is getting very grubby and worn, but never got round to finishing it. I'd really like to get this done as well as writing up cutting and stitching directions so I can repeat it in the future without having to work it out again from scratch.

7. Strippy quilt.

Another project inspired by a quilt in Sunday Morning Quilts by Amanda Jean Nyberg and Cheryl Arkison. I have no expectation of getting this finished anytime soon, as this is my 'leader and ender' project. I've got another ziploc holding one and half inch strips, which I sort into 'nearly the same length' and piece together.

I've got at least four other projects that I could list, and any one of them may be finished first, depending on how the mood takes me, but this is what I want to work on now.

It'll be interesting to look back on this quarters list in 3 months and see what I completed. The sewing pouch I made wasn't even an idea when I wrote my Q2 list ! I'm sure we all do that.


Here's to a stitchy summer, happy sewing everyone,

Tracy x

Finish Along 2014

w


Saturday 5 July 2014

Circle of Geese mini quilt, a finish.

I'm pleased to have finished this little quilt, it crosses off a couple of things I had wanted to try.

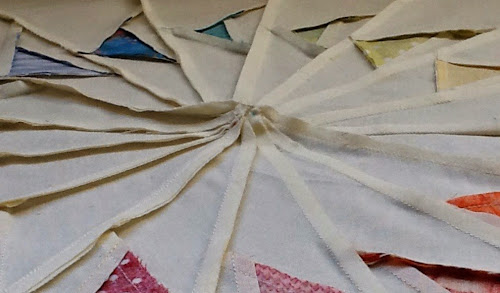
Firstly, after seeing so many lovely 'circles' on blogs and IG ( the prolific and talented Jeliquilts is a particular inspiration) I jumped in with no pattern or plan, other than that it would be a rainbow.

Needless to say, there were many hiccups along the way, the nest of seams in the centre being one.

There was no way to make it lie flat, or any hope of quilting through that volcano-like protrusion, so the only option was to unpick a section..

...and cut out the offending seams

Then all I had to do was replace four pieces to fill the centre and 'voila' from 16 seams to 4 !

This is why patterns are a good idea. We fool ourselves into thinking 'that looks easy, I don't need to buy a pattern'. But that's because we haven't gone through the whole process of calculating fabric yardage, what size and shape to cut the pieces, order of construction, when to press, which side to press too (sometimes this really matters), etc, etc. If writing patterns were easy, we'd all be doing it.


Most patterns for this type of precision piecing tend to be paper pieced. I'm not a fan of paper piecing myself which is probably another reason I just jumped in. If you are, then the aforementioned Jeliquilts has a few, including some insanely small pincushion sized circles!!

Although I have to say, I didn't expect this to be straightforward, sometimes I just like the challenge of attempting something without knowing how I'm going to do it. I always learn something from the process.

I had intended to densely FMQ with small spirals in the negative space, to make the geese pop out from the background. But after I'd added the border I felt I wanted to accentuated the 'motion' of the geese, so one large spiral seemed the way to go.

I used a wine glass as a Hera marker to press a circle into the centre. I then drew a spriral from the center out to the indentation. From that point I could just use the edge of my walking foot and follow the previous quilting line. It worked a treat. I started at a glacial pace in the centre with short stitches and as the spiral opened out I lengthened the stitches and went a little more quickly.

Initially I was going to make this into a cushion but my husband and daughter have had enough of my cushions for a while. So with the hope of one day having a dedicated sewing room I have made this into a mini to hang on the wall.

Quilt; Circle of Geese Mini. Finished at 18 inches square.

I'm happy to tick this off my Q2 finish-along list :0)

Linking up with our host for the FAL, Katie at The Littlest Thistle

Finish Along 2014


Wednesday 25 June 2014

Circle of Geese

I'm soooo close to crossing this mini off my Q2 FAL list !

As soon as I'd decided on the scrappy border I knew I wanted a stripey binding. Luckily I had this black and white fabric languishing in my stash. When I auditioned it I knew it was perfect (my husband disagrees, but he can make his own)!

I can never just 'cut 2 1/2 inch double fold binding. I always need to try a piece out, as depending on how thick the finished quilt sandwich is and how wide I want the binding and wether I want to hand or machine finish, these factors all determine how wide my binding strip needs to be. In this case I cut 2 1/4 inch strips

and had my needle set at 5.0 (3.5 is centre, so 3 spaces to the right) and the edge of the quilt aligned with the edge of my walking foot.

All I need to do now is add some folded corner to the back and finish hand stitching the binding, I always like this part. This little mini is destined to live on my sewing room wall ( AKA our spare room).


Better get back to it,

Tracy :0)


Linking up with WIP Wednesday at Freshly Pieced


WIP Wednesday at Freshly Pieced


Sunday 13 April 2014

Finish along Q2 list...

And some finishes....

I did manage a couple of finishes from my Q1 FAL list, what I didn't manage to do was write up a post and link up. That was a shame but the whole point is to motivate myself to finish, so I did partly achieve that.

I had four items on my Q1 list, the two that I finished were;


This cute little car seat blanket for a friend's baby due in May. It was kick started by the abundance of economy blocks that were appearing on IG and especially the always beautiful piecing by Rita of Red Pepper Quilts, check out her work, it's always gorgeous (and quick!).

I started off by following Rita's tutorial, which I should have stuck to, because when I tried to fussy cut the centre patch, that's when precision and sharp points went out the window.


I still leant a lot, I always try to attempt a new technique with each project and with this I tried curved corners and backing with Minky / fleece. Both went well and I'd definitely back with with fleece again as this little quilt now has a lovely weight and drape and is soft and cuddly.


The second finish was my Rainbow circle quilt from the lovely book by Joelle Halvorsen. It now has a nice spot in our spare room, and can be seen every time I go upstairs.


Now on to the non-finishes, which head up my Q2 list;

1. Rachel's scrappy stars.


A very long term WIP which needs to be finished ASAP, as I know if it gets put away again it will be another year before it's completed. I've backed it with a flannel sheet as I wanted a lightish cover that can be used all year round on my daughters bed.


2. Orange peel appliqué handwork.

I've been enjoying the slow pace of this project. I've made progress whilst watching my favorite program of the moment, Nashville.

It also allows me to contentedly sit through the Grand Prix, which normally wouldn't keep me on the sofa for more than 10 minutes at a time, so my husband doesn't get disturbed during his program, win-win.


Making their first appearance on a FAL list;


3. Plus quilt.


I've been trying to sort through my stash, I've got quite a bit of fabric that has been in there for years and has never seen the light of day. Some fabric I have completely fallen out of love with, and every time I pull it out and put it back I feel a pang of guilt. So I decided its 'use it or lose it' time. I've pulled quite a bit of stash and started cutting it for several projects, this is the first to make it on to the list.


I've cut enough for 50 'pluses' so far. I've organised the pieces into two ziploc bags 'whole pluses' and 'part pluses'. I had a quick play with the pieces but just need to get on with it.


4. Rainbow geese circle.


I blame this one (and if I'm honest, no 3, too) on Lucy of Charm About You. I joined up to her 'Le Challenge' with the theme of 'order'.

 photo LeChalleng

As is usual one thing led to a completely different thing and I found myself trying to bring some kind of order to my scraps. Whoever is to blame I've nearly got a finished cushion :-). Just needs quilting and making up, totally doable in three months. I didn't finish this by the end of the challenge either.


5. 'Suburbs' pattern from Alison Harris of the blog Cluck Cluck Sew.


I've been stalking this pattern (and the blog) for quite some time. I'm on a self imposed fabric diet at the moment, so when I decided I needed to use the fabric I do have it was the perfect reason to buy this pattern.

The decision was not helped by my non-existent self control and the ease of buying a PDF pattern online. I thought I would just cut the blocks as I was cutting the 'pluses' for number 3, but the houses looked so cute, and I wanted to use some of my Flea Market Fancy that I've been saving. And once I'd cut some fabric I needed to see if I could make the pattern match. I've only made four houses so far but I'm itching to make more.


That's it, I'm stopping at five as I'm sure I'll only finish some of these and probably start and finish something else entirely.

As well as the sewing I need to finish painting the garage door, I've already primed and undercoated, it just needs the gloss.


I do all our decorating, I'd rather decorate than clean. I'd rather do anything than housework. I hate housework. A lot.


What would you rather be doing?

Good luck with your list, linking up with our host, Katie at the Littlest Thistle

Finish Along 2014

Tracy x